Pages

Wednesday, November 5, 2014

What a Skitch!

One of the great things I get to do at my job is to facilitate a teacher-led professional development series called TLP-C. Basically, we meet online monthly and teacher shares a cool tool they've tried in the classroom. We learn a bit about the tool, hear about how the lesson went, talk about advantages and disadvantages and share ideas about integration. It is a great low-key, high-impact professional experience.

Below is a summary of our October session that can also be found at: http://blogs.acpsk12.org/tlpc/2014/11/05/what-a-skitch/

A big thank you to Lois Lansing, 3rd grade teacher from MacArthur Elementary School, for sharing how she has used Skitch in the classroom. It was so helpful to hear her ideas about how she used Skitch and to listen to stories from her classroom. If you missed our live session, you can watch the recording by clicking right here:
http://blogs.acpsk12.org/tlpc/files/2014/11/erosion1-2k4lrdz.jpg
Recording of TLP-C Skitch Lessons You Can Use October 30, 2014

Skitch is an app as well as a desktop application that allows you to annotate images   with captions, arrows, and other drawing tools. This is a great tool for anytime you want students to show what they know about an image. And, it is a great tool for app-smashing because the images you annotate in Skitch can be pulled into other apps or software or websites to create awesome digital stories and presentations.
erosion2

Lois shared a wonderful lesson she did when she was a 2nd grade teacher. After spending a few days learning about erosion, students were charged with the task of identifying erosion around their school building. Students then used Skitch to annotate those pictures: using arrows to draw attention to what they saw, using text boxes to explain what they saw and using other drawing tools (circles, squares) to highlight these examples of erosion. Next, Lois had the students import their Skitch images into PowerPoint to make recommendations about what the school should do to improve the school and slow down the erosion.

As we discussed using Skitch, we talked about some good tips like:
  • giving students some “play” time to take selfies and learn the Skitch tools
  • be clear about expectations if taking iPads outside
  • have iPads set up to email images to teacher to use the images with other applications on the computers OR set up Dropbox accounts on iPads for image sharing
  • partner students to promote collaboration
text-mark-up

Another great tip Lois shared was that you can use the blurring tool in Skitch to blur students faces. So if you want to post public pictures of students but don’t want them to be identifiable, you can use this helpful tool to do so!

Lois shared another fantastic way to use Skitch which is for highlighting text features. This was a really neat idea where students could highlight topic sentences, add questions they have, or even point out citation information like the URL for the website. More ideas that were shared were:
  • let the students take the selfies and then label (eyes, ears, nose) in a target language (Spanish, French, Chinese, etc.)
  • take pictures of student artwork and have students label skills they are working on (perspective, lines, negative space, etc.)
  • have students make addition stories using counting bears and use Skitch to explain the addition
  • take pictures of primary sources or maps and have students label important items
Have your own ideas about using Skitch or questions about how to use Skitch? Leave a comment below!!


Tuesday, July 22, 2014

Does adhering to copyright increase student creativity?

I was happy to help out a colleague last week when she asked if I would appear as a guest on a webinar hosted by Michigan State students in the Master's of Arts in Educational Technology program. The topic was "Copyright in Education." Copyright is a topic which constantly needs to be addressed and readdressed both as the digital world changes the implication of copyright and as educators continue to be made aware of their need to adhere to copyright laws. Participating in this webinar ended up being a great opportunity to learn about new resources for teaching about copyright and a thought-provoking conversation about how copyright influences student creativity.

I was joined on the webinar by Jeremy Whiting and Kate McCallum, two awesome journalism and media teachers that really knew their stuff and have daily experiences of working with students to more deeply understand copyright. I loved the ideas they raised about making sure your administrative team understands copyright and how you may even need to educate parents about copyright laws. I admire their ability to stand up to parent pressure over senior videos (but it's always been done like this!) and to administrators that might not understand your expectations for students (but no other teachers require students to do this!).

By Denise Krebs:
https://www.flickr.com/photos/mrsdkrebs/8710565083
/
Hopefully I had a few good bits to add about educating students about copyright (LOVE Common Sense Media lesson plans on this topic) and resources for copyright free images (Morgue File, Pics4Learning, Creative Commons). I strongly recommended sending students to the advanced search section of Google Images and showing them how to search for images that can be shared, modified and even used commercially.

The turn of the conversation that I thought was most interesting was the idea that getting students to comply with copyright laws actually introduces more creativity into the classroom. We all had experiences where students chose to compose their own music, draw their own pictures or use their own photography instead of searching for copyright free images. I love this idea that the limits of copyright actually increase critical thinking and innovation, especially since that is part of the whole reasoning behind copyright law in the first place, to foster creativity!

If you'd like to view the webinar yourself, below is a YouTube video of the conversation. There is also a TitanPad that would let you follow the conversation. Probably the most helpful thing for most teachers, would be this Google Doc that contains a number of helpful resources about copyright, copyright myths and good resources for copyright-free materials.


I'd love to hear more ideas about how you help your students and teachers understand copyright laws and what impact you feel like it has on learning in your classroom. Leave a comment below!

Tuesday, April 8, 2014

Drones in School?

My job is so much fun. In the past few weeks I have had the pleasure of watching a group of seventh graders figure out how to operate a drone. Yes, a drone. Last year an amazing teacher at our school had her class writing grants for different science-based change projects. One class was working on raising awareness about and reducing light pollution. They wrote a grant to purchase a drone so that they could take pictures over our city to compare light pollution on different days. But now that project is over.... so.....

The students in my Student Technology Assistance Team (STAT) found the drone and learned how to make it work. They figured out how to set up the wireless network and connect a device (phone, iPad) to it. They figured out how to fly it and how take pictures and videos as they flew it. It wasn't a smooth process. We had trouble remembering to charge the battery, we had a few crash landings, we might have tried to put it together backwards. *grin* But overall, these seven students now know more about drones than any of their teachers.

Which brings me to our next project. The other day the STAT kids shared what they knew with 30 teachers from across my school division. They prepared their presentation and wrote a script explaining what a drone is and how they might be used in society. Then they modeled how to fly the drone. But we all know modeling isn't enough when teaching. So, next, they let the teachers try out the drone for themselves. Teachers had a blast trying out the drone and loved being taught by students.

But now what? We have this really cool drone, we know how to fly it, we know how to take pictures with it. Some teachers know about it. But how can it be used from here? Our students have come up with a ton of lesson ideas which I think are really cool. I'd love to hear more ideas or if you think these ideas are even plausible.

World Language or Beginner English Language Learner classes
  • Use target language to give directions to the pilot
    • Ex: Arriba!
  • Use target language to describe what is being seen

Math
  • Take aerial shots to study perimeters or other geometry concepts
  • Comparing how things look from the side, from above, etc.
  • Make a giant graph, drive the drone to specific points
  • Teach the concepts of X, Y and Z

Civics/Social Studies
  • Debate about privacy rights
  • Take aerial shots to compare to historical maps
  • Practice map skills (north, south, east, west)

Science
  • Understand lift and flight design
  • Aerial shots of erosion, watersheds, etc.

Physical Education
  • Aerial shots of students playing sports for analysis

Technology
  • How does it work?

English
  • Write pro/con debates about the use of drones

Art
  • Aerial shots to draw from
  • To teach perspective

Wednesday, April 2, 2014

Messing around with Green Screens

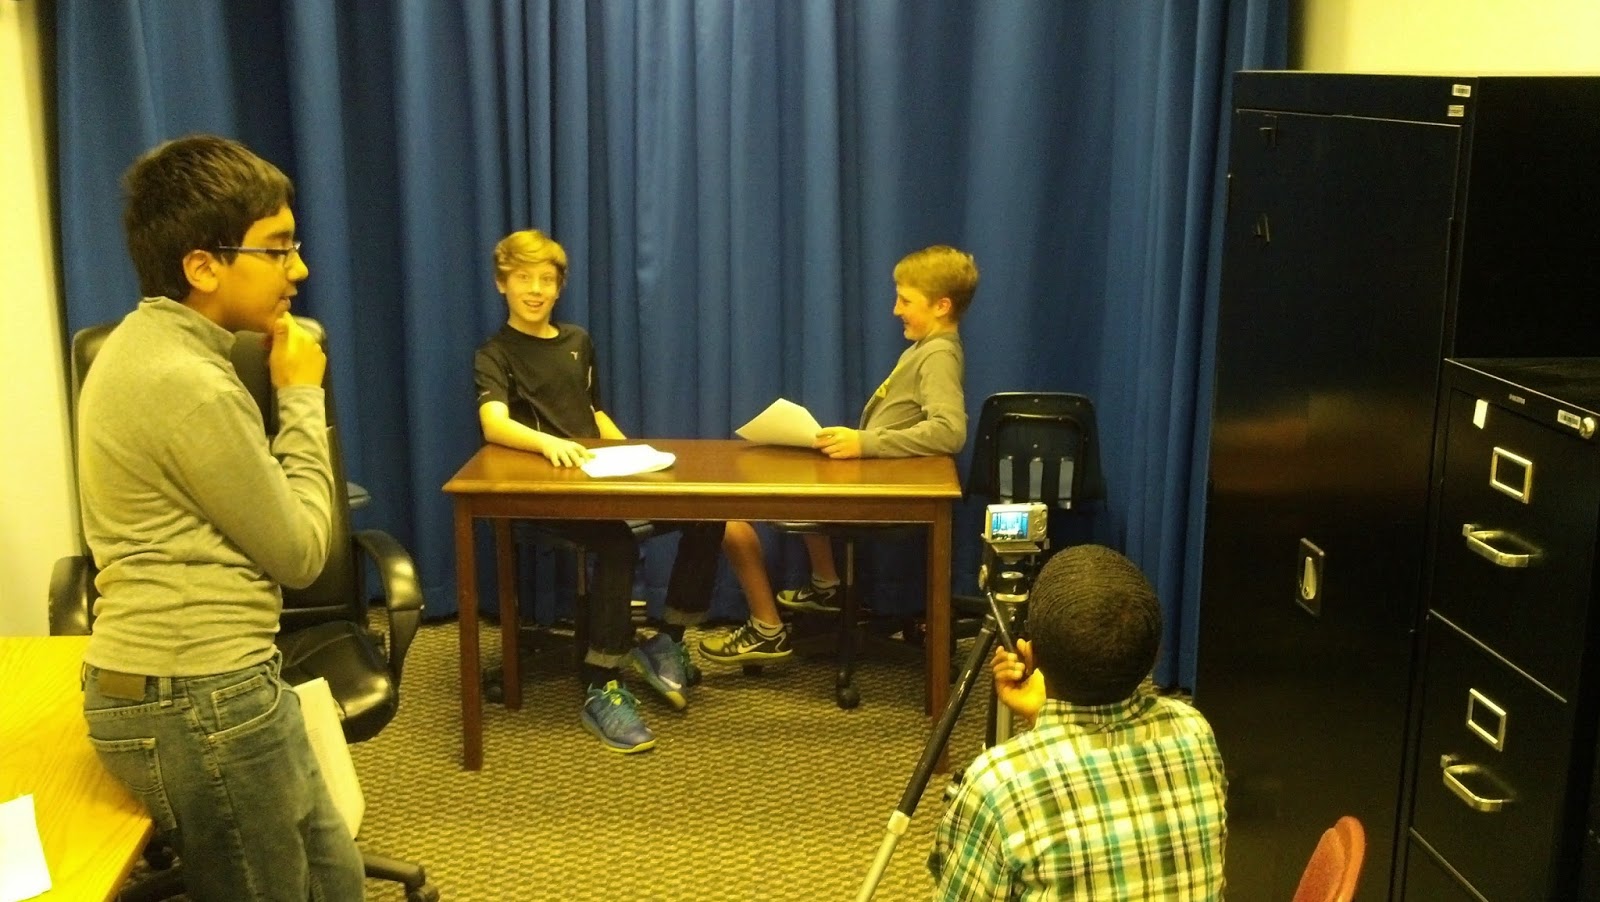
We been having a fun time these last few weeks messing around with green screen technology. It has been a lot of fun and we've learned a lot. (And it gave me a reason to clean out our "studio" - yea!).

If you've never tried green screen before, there are lots of ways to do it. In fact, when we do it, it isn't even a green screen, it is a blue one! The first step is to have a blue curtain or to paint a wall blue. In the past, I've even taped a blue sheet up to a wall and got pretty good results.

Next you add some code to Windows Movie Maker. If you aren't a computer programmer or if coding sounds intimidating to you, don't worry. I found the instructions here: http://www.wikihow.com/Chroma-Key-in-Windows-Movie-Maker super easy to follow. You do need to have the older version of Movie Maker though, the one for Windows 7 doesn't seem to work.

Once you add the Chroma Key, all the rest is a matter of editing in Movie Maker. The directions above take you through the rest of the steps. I've also written them out here: Greenscreen Directions if you are interested.

So besides feeling like a rock star when you figure out how this works, watching to kids videotape and edit is really fantastic!

The class I worked with had prepared skits ahead of time and came in "the studio" ready to film. I had a camera and tripod set up, but they did the rest. The filmed, transfered files from the camera to the computer and followed the directions for editing in Movie Maker.

They loved, loved, loved filming. Their skits were clever and creative and they could have recorded and re-recorded themselves all day. Gotta love 6th graders. TIP: tell students they only get 1 take!

The also loved, loved, loved finding images for their background. We found that color pictures worked best and that anyone that wore a blue shirt in front of the blue curtain disappeared when we applied the green screen! TIP: make sure students wear clothes that are a different color than your background!

Now, when it came to the editing, it definitely required more attention to detail and not all the kids were up for that. But, there were a few kids in each group that shined at this part. Maybe they hadn't been the ham in the skit or the director that remembered all the props, but when it came to understanding the editing process, they were experts. It was really interesting to notice how hard this part was for many students. It made me continue to think deeply about how we can offer more technology process opportunities for students in schools. More students need to be good at this step, understanding how the program works and that they can conquer it.

There is nothing like watching kids create a video that they've created start to finish. Greenscreen is no small undertaking but the outcomes are worth it!

I'd love to hear how others have used greenscreen and their ideas and tips about it!

Wednesday, March 26, 2014

Vokis Can Bring out Student Creativity


(this piece was also posted at: Voki Guest Blogger/)

I still remember the first time I was introduced to Voki, I was at a tech conference. The presenter was showing a number of different fun, new, tools, but Voki stole the day. Honestly, I can't remember the next 20 minutes of the presentation because I was so busy having fun playing with Voki, recording myself, giving myself new outfits, sending emails back to my boss saying things like "Vokis are so much fun!" I was immersed in learning the new tool and practicing my digital literacy and fluency. It is the same for our students.

Voki opens up a world of hands-on creativity for your students.

Show any classroom of students Voki, and you will immediately see them trying it out in a myriad of ways. I had the pleasure of joining a student tech club after school one day and I did a quick demo of Voki. The teacher and I had a plan that they would use their Vokis to introduce themselves to me (a visitor for the day) and then we would share what each student did. It was a nice plan, and the students would have done it. But we quickly realized, we had set the bar way too low, these kids had more ideas about what they wanted to do!

Voki lets you have your Voki speak in several languages.

Some students immediately started playing with the language feature of Voki. While this tech club is in a richly diverse school, where many languages are heard every day, these students still had a great time listening to phrases spoken in languages they had never heard before.

Voki allows you to re-record until you like how it sounds.

Some students probably practiced what they wanted to say 5-7 times before they saved their Voki. This repeated practice is fantastic for English Language Learners and other students working on their oral language skills. Asking a student to re-read passages can be tiresome, but ask them to make a Voki and they will repeat the passage until they like how it sounds, over and over again.

Voki lets students play around with identity.


Let's face it, not all students are pleased with their self-image. I've seen students change their avatar dozens of times to find a "look" that they want to project. Don't overlook the importance of this! As students travel the weary path of adolescence and pre-adolescence, they crave opportunites to try on different looks and personas. Using Voki to do this is a safe and fun way to change your hair color, add an earring or see how a British accent sounds. Letting students play with these avatars as they complete a content-based assignment is as developmentally appropriate as free play in Kindergarten.

Voki is a great way to discuss Digital Citizenship.


Our students might not need our guidance when it comes to figuring out how to make a Voki, but they do still need our guidance about what makes a good and appropriate Voki. Voki is a fun way to get students talking about what make a quality presentation. If the assignment is to have an Abraham Lincoln Voki talk about three of the most important parts of his presidency, showing him with sunglasses on isn't the best way to convey your message. Likewise, students should never use Voki to share too much information about themselves or to embarrass others. It is imperative that we have these conversations with students and why not do it with a tool they love!

Voki can be used in any classroom:
Science: Make a Voki to explain the outcomes of a lab. (I've seen students do this for their Science Fair presentations!)
Social Studies: Choose a Voki of an historical figure and have them give three important facts about their lives.
English: Make a Voki that represents a character from a novel. Have them "saying" the theme of the novel.
Math: There is a lot of vocabulary in Math. Have a Voki provide definitions for key terms.
World Language: Provide a description of a person in the target language, see if the students can make a matching Voki.
Physical Education/Health: Let a Voki give facts about staying fit and healthy.

To get the most out of Vokis, make sure you give your students time to play when making their Vokis, you'll be surprised with the results!

Look! We got Nooks!

More and more eReaders are becoming the go-to devices for readers everywhere. We love the ability to carry 50 books at time with us on the airplane, to never lose our place because our bookmark fell out and to search names of characters to find when they were first introduced. That is why I was so excited when the English Language Arts department at the school where I worked decided to buy Nooks!
We decided to launch the Nooks in a 6th grade co-taught classroom. A number of the students in the class have Individualized Education Programs and many do not think of themselves as readers. Our goals were to get the students more excited about reading and to choose books that closely match students' lexiles (reading levels).
Our first day in the class, the reaction was more than positive. Students loved the layout of the device and had fun discovering all the features available to them. We all love to personalize our devices and Nooks are no different. Students learned (and taught each other) how to change the background image, adjust the font size to suit them and even adjust the orientation to the style they liked best. The ability to make a book their own was a new experience, and it makes a difference, having a book that you can change and modify increases student ownership in the device and increases their interest in reading the text.
Beyond the personalization of Nooks, students were able to practice a number of different during reading strategies. Students can highlight passages that they find significant, much the way readers in a book club will underline sections they want to share of come back to. Students can also use the embedded dictionary to look up words they don't know. For reluctant readers, the ability to find out the definition of new words without asking the teacher or physically using a dictionary (and thus showing the whole class you don't know the word) is a gift. Watching the students read on their Nooks, you can see them smoothly using all these techniques and empowering themselves to be better readers.
As this first class tests out the Nooks and we see the progress they are making, we look forward to expanding the use of the Nooks to more classes and for more novels. Students will be able to check out eBooks from the school library and the public library. We will be able to load novels that specifically match individual student lexile levels and increase their access to non-fiction texts. As we move forward, these devices will continue to give students access to relevant devices, literacy skills and personalized details which increases their interest and engagement with a wide variety of texts.