Pages

Showing posts with label Social Studies. Show all posts

Tuesday, January 17, 2017

You've done mystery location, now what?

I've had the lucky opportunity to plan and coordinate Mystery Location calls for all of our sixth grade social studies teachers in my school. It is so fun to help arrange their line ups and to co-teach the lessons as often as I can. I love watching the students try to solve the puzzle of where the other school can be from and the level of collaboration that is necessary for success. If you haven't done a Mystery Location call yet - definitely try it out. You'll be hooked. Want to know more? Check out Who Doesn't Love a Mystery?

Because of our success with sixth grade social studies, I had a few other teachers approach me and ask what kinds of global connections they could make. We also had a lot of fun with some Mystery Calls and wanted an excuse to call those same classes back. So I poked around and read about Mystery Number.

Mystery Number follows the same premise as a Mystery Location call. This time each class picks a number. The range of numbers can match the level of students. For very young classes you might limit it to 0 through 20. For our self-contained Special Education class we did whole numbers between 1 and 100. This year we are hoping to do 1 through 100 but to the hundredths decimal place.

Once each class has picked their number, each side asks a yes or no question. We tried questions like "Is the number even?" "Is the number prime?" "Is the number greater than 50?" We practiced the day ahead by having small groups pick numbers and ask each other questions. It was a great way to review academic vocabulary like even/odd, greater than/less than, and prime. Some of our students even tried using multiples and factors which was excellent. I'm looking forward to the questions our decimals class will ask.

Our students found it very helpful to have number charts that they could mark up. The classroom teacher I worked with had clear folders that we could slide the number chart into and then mark up with dry erase markers. This was definitely ideal.

I also found it helpful to have one class ask questions until they guessed and then switch and have the other class ask until they guessed. When we do Mystery Location we always alternate questions but with Mystery Number that transition seemed harder for the students. Play around with it to find a format that works for your students.

There are several reasons to try out a Mystery Number call. First of all, it is so important for students to have the ability to reach beyond their classroom. There is something about communicating with a class in a different part of the country that slowly opens their eyes to the world beyond them. Mystery call have sparked political, social, cultural, and economic conversations in our classes. Secondly, it is an authentic opportunity to put into practice something they've been learning. Suddenly there is a reason to know which numbers are prime beyond that "it will be on the test." Now knowing which numbers are prime helps you narrow down your choices, plan your next question and accurately answer questions from the other class. Thirdly, Mystery Calls give all students a place in the classroom. Students that I've never seen speak up in class have a chance to get in front of the web cam and ask a question to a class across state boundaries. Students that are careful note takers become invaluable because their number chart is the reference point. Each time I do a call there is a least one student who surprises the classroom teachers with their interest and level of participation. So, give Mystery Number a try. And if you are looking for a partner class please leave a comment below so we can get in touch!

Thursday, June 11, 2015

3D Printing in Social Studies

People who know me know I've been talking about 3D printing for years. I get giddy when I think about how accessible 3D printing has become and that my children are growing up in a world where they can print their own tools, toys and trinkets. Therefore I was over the moon when my director purchased a 3D printer for us to bring into the schools where we work.

I had one teacher who was interested right away. A sixth grade social studies teacher had been going through our technology professional development program, Teacher Leadership Program, and was looking for a project he could dig into. Together we developed an idea to have his students design a coin about one of the first five presidents (a topic directly from our state standards). Each class would vote on the best design and then we would print the best ones.

There was a serious buzz in the room when I brought the 3D printer in. We have a Makerbot Replicator Mini which is compact and light-weight, so I carried it into the room myself. Students were full of comments and questions:
  • "It's smaller than I thought it be."
  • "How much did it cost?"
  • "How long does it take to print?"
  • "I want one!"
First I reviewed some key aspects of the software we were going to use to design the coin. We decided to use 3D Tin by Lagoa. This software allows students to log in with a Google account and since our school has Google accounts, this was perfect. 3D Tin has some great starter tutorials as well so students were encouraged to watch several of these before getting started. Students took to the software well and taught each other many of the less intuitive aspects of the program. 

Designing in 3D is definitely easier for some students than others. Some got frustrated quickly while others drew complicated objects while I was still getting some students logged in. Showing students how to return to a home view or rotate objects were two key techniques.

What I loved about this lesson was that students got more creative due to some of the limits of the program. They drew images using small blocks (like one might in Minecraft). They got more symbolic than they might have been given other projects where they could copy and paste images or long passages of text. I also loved how they inspired each other. One students would figure out how to draw, say, the Washington Monument, and suddenly you'd see others working on a drawing of the Capitol. Our English Language Learners did fabulously with this lesson. Since most of the modeling is visual, they had no problem creating great images for their coins.

I also loved all the natural curiosity the 3D printer brought out. Students started showing up before school and during lunch to watch it print or to ask questions about how it worked. Some students that aren't your typical high achieving or tech-geeky students were the best at finding creative ways to make their 3D model or to help out with the printing process. My heart is always lifted by lessons that draw new students into the learning process.

Tuesday, April 8, 2014

Drones in School?

My job is so much fun. In the past few weeks I have had the pleasure of watching a group of seventh graders figure out how to operate a drone. Yes, a drone. Last year an amazing teacher at our school had her class writing grants for different science-based change projects. One class was working on raising awareness about and reducing light pollution. They wrote a grant to purchase a drone so that they could take pictures over our city to compare light pollution on different days. But now that project is over.... so.....

The students in my Student Technology Assistance Team (STAT) found the drone and learned how to make it work. They figured out how to set up the wireless network and connect a device (phone, iPad) to it. They figured out how to fly it and how take pictures and videos as they flew it. It wasn't a smooth process. We had trouble remembering to charge the battery, we had a few crash landings, we might have tried to put it together backwards. *grin* But overall, these seven students now know more about drones than any of their teachers.

Which brings me to our next project. The other day the STAT kids shared what they knew with 30 teachers from across my school division. They prepared their presentation and wrote a script explaining what a drone is and how they might be used in society. Then they modeled how to fly the drone. But we all know modeling isn't enough when teaching. So, next, they let the teachers try out the drone for themselves. Teachers had a blast trying out the drone and loved being taught by students.

But now what? We have this really cool drone, we know how to fly it, we know how to take pictures with it. Some teachers know about it. But how can it be used from here? Our students have come up with a ton of lesson ideas which I think are really cool. I'd love to hear more ideas or if you think these ideas are even plausible.

World Language or Beginner English Language Learner classes
  • Use target language to give directions to the pilot
    • Ex: Arriba!
  • Use target language to describe what is being seen

Math
  • Take aerial shots to study perimeters or other geometry concepts
  • Comparing how things look from the side, from above, etc.
  • Make a giant graph, drive the drone to specific points
  • Teach the concepts of X, Y and Z

Civics/Social Studies
  • Debate about privacy rights
  • Take aerial shots to compare to historical maps
  • Practice map skills (north, south, east, west)

Science
  • Understand lift and flight design
  • Aerial shots of erosion, watersheds, etc.

Physical Education
  • Aerial shots of students playing sports for analysis

Technology
  • How does it work?

English
  • Write pro/con debates about the use of drones

Art
  • Aerial shots to draw from
  • To teach perspective

Wednesday, April 2, 2014

Messing around with Green Screens

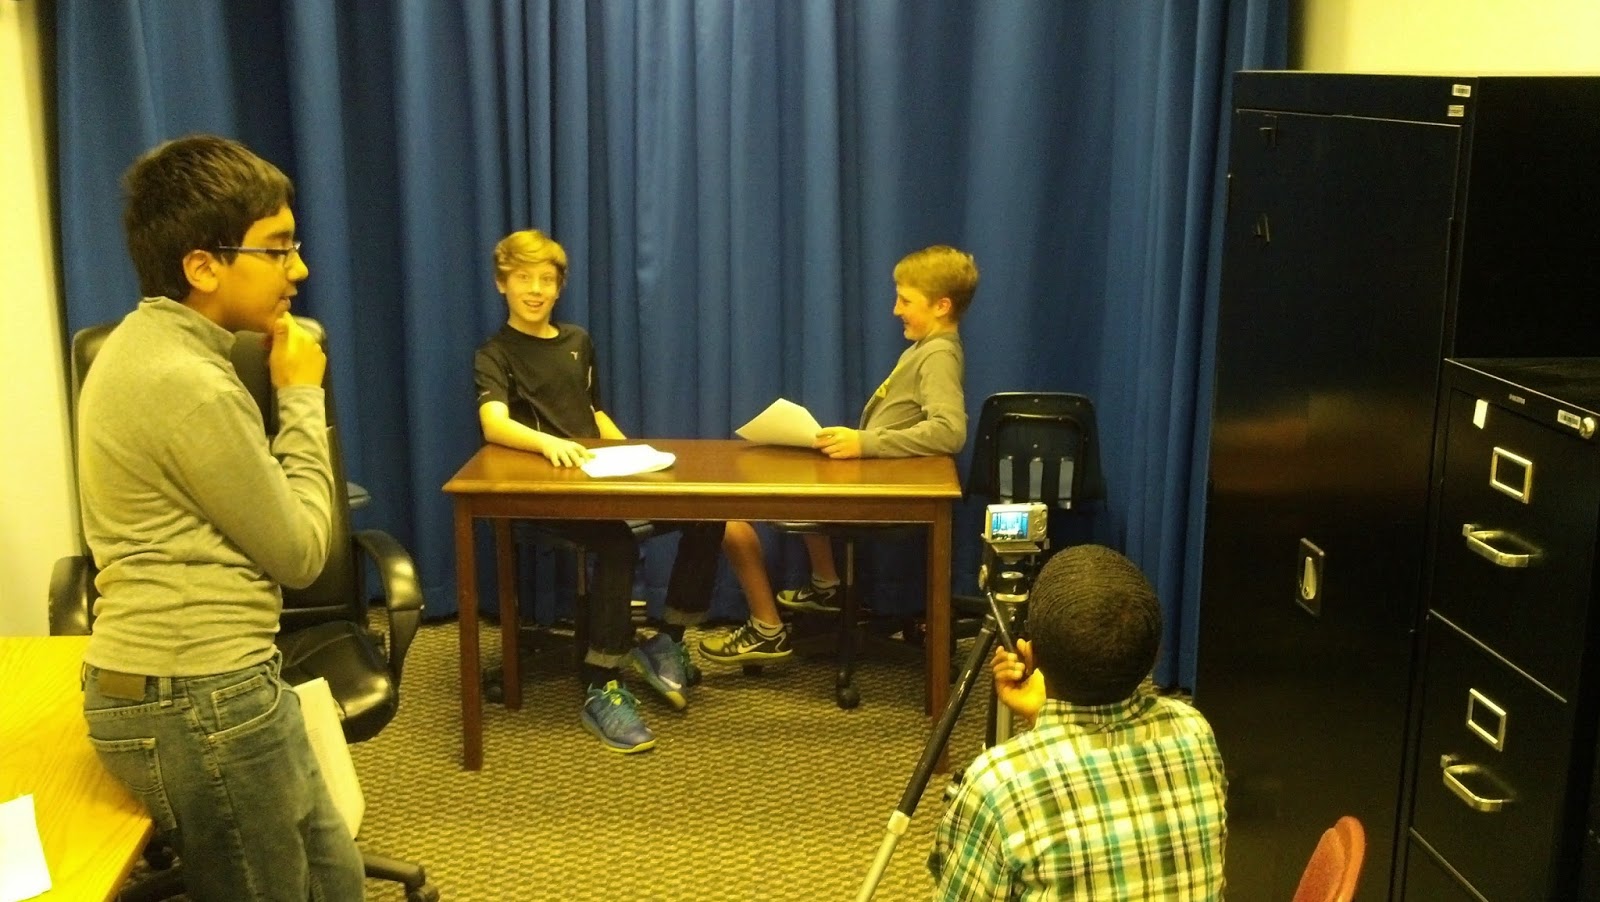
We been having a fun time these last few weeks messing around with green screen technology. It has been a lot of fun and we've learned a lot. (And it gave me a reason to clean out our "studio" - yea!).

If you've never tried green screen before, there are lots of ways to do it. In fact, when we do it, it isn't even a green screen, it is a blue one! The first step is to have a blue curtain or to paint a wall blue. In the past, I've even taped a blue sheet up to a wall and got pretty good results.

Next you add some code to Windows Movie Maker. If you aren't a computer programmer or if coding sounds intimidating to you, don't worry. I found the instructions here: http://www.wikihow.com/Chroma-Key-in-Windows-Movie-Maker super easy to follow. You do need to have the older version of Movie Maker though, the one for Windows 7 doesn't seem to work.

Once you add the Chroma Key, all the rest is a matter of editing in Movie Maker. The directions above take you through the rest of the steps. I've also written them out here: Greenscreen Directions if you are interested.

So besides feeling like a rock star when you figure out how this works, watching to kids videotape and edit is really fantastic!

The class I worked with had prepared skits ahead of time and came in "the studio" ready to film. I had a camera and tripod set up, but they did the rest. The filmed, transfered files from the camera to the computer and followed the directions for editing in Movie Maker.

They loved, loved, loved filming. Their skits were clever and creative and they could have recorded and re-recorded themselves all day. Gotta love 6th graders. TIP: tell students they only get 1 take!

The also loved, loved, loved finding images for their background. We found that color pictures worked best and that anyone that wore a blue shirt in front of the blue curtain disappeared when we applied the green screen! TIP: make sure students wear clothes that are a different color than your background!

Now, when it came to the editing, it definitely required more attention to detail and not all the kids were up for that. But, there were a few kids in each group that shined at this part. Maybe they hadn't been the ham in the skit or the director that remembered all the props, but when it came to understanding the editing process, they were experts. It was really interesting to notice how hard this part was for many students. It made me continue to think deeply about how we can offer more technology process opportunities for students in schools. More students need to be good at this step, understanding how the program works and that they can conquer it.

There is nothing like watching kids create a video that they've created start to finish. Greenscreen is no small undertaking but the outcomes are worth it!

I'd love to hear how others have used greenscreen and their ideas and tips about it!

Wednesday, March 26, 2014

Vokis Can Bring out Student Creativity


(this piece was also posted at: Voki Guest Blogger/)

I still remember the first time I was introduced to Voki, I was at a tech conference. The presenter was showing a number of different fun, new, tools, but Voki stole the day. Honestly, I can't remember the next 20 minutes of the presentation because I was so busy having fun playing with Voki, recording myself, giving myself new outfits, sending emails back to my boss saying things like "Vokis are so much fun!" I was immersed in learning the new tool and practicing my digital literacy and fluency. It is the same for our students.

Voki opens up a world of hands-on creativity for your students.

Show any classroom of students Voki, and you will immediately see them trying it out in a myriad of ways. I had the pleasure of joining a student tech club after school one day and I did a quick demo of Voki. The teacher and I had a plan that they would use their Vokis to introduce themselves to me (a visitor for the day) and then we would share what each student did. It was a nice plan, and the students would have done it. But we quickly realized, we had set the bar way too low, these kids had more ideas about what they wanted to do!

Voki lets you have your Voki speak in several languages.

Some students immediately started playing with the language feature of Voki. While this tech club is in a richly diverse school, where many languages are heard every day, these students still had a great time listening to phrases spoken in languages they had never heard before.

Voki allows you to re-record until you like how it sounds.

Some students probably practiced what they wanted to say 5-7 times before they saved their Voki. This repeated practice is fantastic for English Language Learners and other students working on their oral language skills. Asking a student to re-read passages can be tiresome, but ask them to make a Voki and they will repeat the passage until they like how it sounds, over and over again.

Voki lets students play around with identity.


Let's face it, not all students are pleased with their self-image. I've seen students change their avatar dozens of times to find a "look" that they want to project. Don't overlook the importance of this! As students travel the weary path of adolescence and pre-adolescence, they crave opportunites to try on different looks and personas. Using Voki to do this is a safe and fun way to change your hair color, add an earring or see how a British accent sounds. Letting students play with these avatars as they complete a content-based assignment is as developmentally appropriate as free play in Kindergarten.

Voki is a great way to discuss Digital Citizenship.


Our students might not need our guidance when it comes to figuring out how to make a Voki, but they do still need our guidance about what makes a good and appropriate Voki. Voki is a fun way to get students talking about what make a quality presentation. If the assignment is to have an Abraham Lincoln Voki talk about three of the most important parts of his presidency, showing him with sunglasses on isn't the best way to convey your message. Likewise, students should never use Voki to share too much information about themselves or to embarrass others. It is imperative that we have these conversations with students and why not do it with a tool they love!

Voki can be used in any classroom:
Science: Make a Voki to explain the outcomes of a lab. (I've seen students do this for their Science Fair presentations!)
Social Studies: Choose a Voki of an historical figure and have them give three important facts about their lives.
English: Make a Voki that represents a character from a novel. Have them "saying" the theme of the novel.
Math: There is a lot of vocabulary in Math. Have a Voki provide definitions for key terms.
World Language: Provide a description of a person in the target language, see if the students can make a matching Voki.
Physical Education/Health: Let a Voki give facts about staying fit and healthy.

To get the most out of Vokis, make sure you give your students time to play when making their Vokis, you'll be surprised with the results!

Wednesday, May 1, 2013

Website of the Week: ZooBurst

Easily create your own 3D pop-up book, great for lots of uses. The site is free, but requires an email address for registration.

The books are super easy to create, can include a mix of pictures and text. Pictures can be imported from your computer so you can use your own pictures or download pictures from the internet. When you create a book the owner can specify the privacy settings. See the Zooburst gallery for some interesting examples.

I have already had teachers try this format for Science presentations on how the sun creates energy, I could also see using it to:
1) Tell a fractured fairy tale in Language Arts
2) Detail the life of a famous figure from History
3) Give a tour of a cultural region in a World Language class
4) Have English Language Learners tell a story using new vocabulary words.

Wednesday, March 13, 2013

Website of the Week - Voki

http://www.voki.com/
Create an animated avatar that speaks, create a customized avatar that uses text-to-speech to say what you write. Vokis can be embedded in Blogs, wikis and websites.

http://www.voki.com/

Ideas for the classroom:

1) In History, research a famous historical figure: have them "saying" a famous quote.
2) In Language Arts, create a voki for a character in a novel. Have them "saying" a line of dialogue.
3) In World Language, have students introduce themselves in the target language
4) In Math, have students define mathematical terms.
5) In Science, have vokis report the results of a lab.

For more ideas, check out: Voki Lesson Plans

Sunday, January 6, 2013

Website of the Week #1

Hoping to make this a new habit. There are so many great websites out there that I often forget what some of the great ones are! I am hoping that by posting just one a week (I'm also email blasting my teachers these) I will be able to share some great resources, remind folks of great resources, and have a nice catalog of some of my favorite sites when I want to put together a presentation or just make a recommendation to a colleague. And my hidden agenda is that maybe this will get me posting to my blog more often. :) So here is the inaugural....

Website of the Week #1


http://www.sweetsearch.com/
Tired of students going to Google for all their research? Try SweetSearch: http://www.sweetsearch.com/

Sweet Search uses only the 35,000 Websites that their staff of researchers, librarians and teachers have evaluated and approved. This helps students find good information faster. Consider recommending this site to students for all their research!

Have you had good luck using Sweet Search? What do students think? Would love to hear your stories!

Wednesday, April 25, 2012

Who doesn't love a mystery?


I am dying to get a teacher that I work with to try Mystery Skype. The concept is simple but powerful. You link up with another class somewhere in the United States or in the World. You ask questions of the other class and provide clues about your own class until you can each guess where the other class is located. Poof! Fun, authentic, high-level application of geography skills.

I really can't emphasize what a great example this is of using technology in a way that transforms learning: Students will:

  • develop excellent questioning and reasoning skills as they create questions to uncover clues about the mystery location
  • practice communicating via 21st century tools (certainly Skype and can be expanded from there if the classes choose to stay in communication)
  • learn about worlds beyond those of their classroom or school from those who actually live in those places rather than via textbooks or sanitized non-fiction readers
  • have a chance to take on leadership roles as they prepare to answer questions about their own location
Photo by woodleywonderworks
Below are some ideas and instructions for getting going with Mystery Skype. I've pulled these together from lots of great blogs and teacher websites like the following:

Mrs. Yollis
Mrs. Pripp
6th Chat
Mystery State Skyping
Mr. Avery 
School Is Cool  (video)
Teaching Geography and Mystery Skype

I hope to keep adding to this post as I coerce teachers into, I mean, assist teachers with Mystery Skype. Please add your own comments, advice, warnings in the comments below. And if you have a blog or posting about Mystery Skype, please add your link. I'd love to be able to refer teachers to this post as a go-to spot for getting started with Mystery Skype.

STEP ONE Establishing Accounts:

To begin, if you don’t already have one, set up a Skype account for your class. It is free and easy! I found that when I was at school, I was blocked from setting up my account, but I could browse projects other teachers had posted. And I could set up my account easily from home.

BONUS STEP: It is not required, but it is recommended to have an educational Twitter account. If you don’t have one already, create one. Teachers often set up an account like “MrsDunbar” or “MrsD5th” You might find this a useful way to communicate with your Mystery Skype classes or with other professionals (you don’t have to follow the cast of Jersey Shore).

STEP TWO Connecting with other classrooms:

Sign up for Mystery Skype using one of the following links:


Or, make your own connections!

  • If you know teachers in other regions, ask them if they’d be willing to Mystery Skype with you
  • Ask colleagues, parents and students if they have contacts in other states, see if they want to Mystery Skype
  • If you are on Twitter, you can also just tweet that you are looking for classrooms to Mystery Skype with

STEP THREE Preparation for the call:

The technology:
Find out what the procedures are for your school or school division. In my school division, teachers contact the Help Desk so that Skype can be unblocked for that day, time, and location. Our Help Desk will also provide a good web cam and microphone as well as hang around to make sure everything goes well. If you have a great tech department like ours, get them involved in the call too! They can give a clue or ask a question!

Your class:

  • Be sure your students know about your our own region! Have different students research the geography, history, landmarks, weather and other aspects of our location that make your location unique. You want to make sure that your class can answer questions accurately.
  • Brainstorm questions to ask the other class. Usually Mystery Skype projects use close ended questions. Help your class develop a list of Yes/No questions that will help them figure out the location of the other class.
  • Give students roles for the time of the call. The links below have great ideas about how to do this.

The other class:
Try to communicate actively with the other class. Be sure that you are both clear about how the call is going to run, including if you are using Yes/No questions, who is going to go first, what roles your students have. Also be clear if the location will be revealed during the call or after the call. Don’t be afraid to say this is your first time, we educators need to take risks and support each other.

STEP FOUR Share how it went!

I am looking forward to sharing how the first Mystery Skype call goes. I have a couple of victims, I mean, teachers in mind that I am hoping are feeling brave enough to try this out. I will be sure to post here once that happens. In the meantime, I'd love to hear from more teachers how Mystery Skype enhances learning in their classrooms. You can share here too, or tweet about it, or write on your own blog, or share at a faculty meeting, or just share with the teacher across the hall!


Thursday, March 1, 2012

We finally got to start using Quest Atlantis last week! If you have never heard of Quest Atlantis before, it is an immersive learning game. Students have avatars and enter a 3D world where they are assigned missions and quests. The missions and quests all are connected to real-world problems and have engaging story lines. Students must navigate the 3D world to find information and clues to solve a problem. Along the way they meet virtual characters who guide the students and provide information. There is also the opportunity to interact with the avatars of students from other schools. The basis of Quest Atlantis is the concept of transformative play. As the Quest Atlantis website explains:
Students who play transformationally become protagonists who use the knowledge, skills, and concepts of the educational content to first make sense of a situation and then make choices that actually transform the play space and the player.
So, I was curious, how would my students react to this 3D space? Would they experience tranformational play? Would they enjoy exploring the virtual world more than they enjoying learning in a traditional classroom?

Honestly, I wasn't sure I would ever find out. The first hurdle to tackle was getting permission slips signed. Because Quest Atlantis is funded by Indiana University and used for research about emerging technologies and learning, students were required to have parental approval before logging into the Quest Atlantis world. Unfortunately, asking parents to sign a permission slip for a class assignment was not a top priority for these students. After a little cajoling from me and some tough talk from their principal, we finally had all the permission slips in. Whew, step one complete.

The first day playing went, well, great. The students were excited. They were laughing and talking and fully engaged for the 30 minutes we let them play. It was fascinating to watch their personalities emerge online. Some went right to finding out their mission and were running off here and there without really absorbing their task or the information given them. Others spent a tremendous amount of time getting their avatar just right. Still others tested the limits of the world and immediately dove off cliffs, swam in the water and tried to get into places they shouldn't. It was all behavior I would completely expect when giving adolescents a new toy. They were experimenting: some with recklessness, some with caution and some just took it as it came.

Day two we began by showing students how to know where in the 3D world they were. Quest Atlantis uses North, South, East, and West indicators for students to know where they currently are and to locate the places they needed to get to. I was pleased that students got the directional concepts but was fascinated to watch them play and realize that they didn't really understand how to apply these concepts. Since we were playing during their social studies class time, I loved that they were absorbing directionality in a whole new way and actually applying it in a way that was meaningful to them.

My other take-away from day two was that my students need help following directions! I guess I always knew that but assumed that they were having trouble following directions because they didn't really care about the assignments or weren't listening to the directions the first time. But watching them play Quest Atlantis, I realized they actually needed help reading carefully and doing tasks in the order assigned to them. Since many of my students have struggled to achieve in traditional schools, this observation wasn't a shocker, but it was still useful to observe it in the virtual world.

The next step with Quest Atlantis will be for the students to tackle content-related missions in the 3D world. Until then I'll be excited about the following things:


  • The school administrator commented that she'd never seen Student X talk so much as she did when playing  Quest Atlantis that first day
  • A student that was going to be absent for Day Two asked if she could play the game at home. (Yes!)

If playing Quest Atlantis means students are excited to learn and want to work on school work outside of school, I'm ready for more!

Thursday, November 10, 2011

Can You Grant Me a Divorce?

Teaching the Reformation to 10th graders isn’t the easiest thing. Teaching the Reformation to 10th graders at 8 o’clock in the morning is even more challenging. Teaching the Reformation to 10th graders at 8 o’clock in the morning the day after Halloween maxes out the teacher challenge index. Luckily, this teacher had an iPad with her.

This week I got to hang out with a great Social Studies teacher and her 10th graders as they took on the task of creating a talk show script about the Reformation. The task was to demonstrate what they knew about the Reformation by creating a dialogue between Henry VIII and the Pope. The teacher could have just required that the students submit a written script. She could have also required that the students perform their scripts in front of the class. What she decided to do instead was try out an iPad app called Puppet Pals.

Puppet Pals allows you to create a video by dragging in characters, selecting a background and recording your voice while manipulating the characters and setting. The result is a captivating original movie. The free version of Puppet Pals comes with a few characters and backgrounds but for $2.99 you can purchase the director’s pass which gives you 8-10 different sets of characters and backgrounds, including, to our delight, a talk show set! The Director’s Pass also gives you the option of creating puppets and backgrounds from photos you’ve taken or photos you’ve saved from the Internet.

I wanted the students to be able to play with the app right away so I went ahead and searched for fair use friendly images of Henry VIII, a Pope, and some other Reformation-relevant figures (thank you Advanced Search in Google Images). The teacher introduced the assignment and we pulled out the iPads. I briefly created a silly little practice movie so they could get the idea of how the app worked. I then showed a more serious example similar to their assignment that I had made about Buddhism and Confucianism (also reviewing a concept from earlier in the year – yea!). The kids were smiling and laughing, something I love to see when a new assignment is explained.

The students took a full class period to write their scripts. The teacher worked closely with them to be sure they were accurate in their writing and to encourage them to create a script that felt like a talk show. Then, they were ready to record.

Some observations while they recorded:
  • Stakes are higher for students when they care about the product.
  • These students rehearsed a few times before ever touching the iPad – unprompted.
  • Once they were recording “live,” students often took several “takes” of the video before they were satisfied with the results. It was normal for students to record 2-3 times before agreeing the movie was good enough.
  • Vocabulary terms are actually absorbed when the students use them for themselves.
  • More than once a student asked how to pronounce a word they had included in their own script. “Heir” and “annul” were words they had seen in their reading and they knew enough about to include in their script, but it was when they had to pronounce it and read it with meaning that the students started to really own these vocabulary words.
Students worked collaboratively and had fun.
  • I never overlook the importance of students enjoying what they are doing. Smiles and laughter just make for a more pleasant learning environment.
  • I can’t wait to see if this topic is something that these students can remember better later in the year due to their high interest in the assignment.
  • It was lovely to see students encouraging each other and asking for help as they acted out each other’s script.
  • As I was leaving, I watched a young guy rewrite his script in neater handwriting so that his partner would be able to read it. I’m wondering how often he rewrites his tests papers so his teacher can read it better?

Tips the students would share:
  • Practice before recording.
  • Practice moving your characters around so that it looks like they are really talking.
  • Use the pause button to catch your breath between lines without losing flow in the movie
  • Press stop before trying to save – otherwise the app crashes!
  • Save, save, save.
  • Create a story that contains something you can relate to (this tip is actually from my 8-year-old who adores this app!).

Click here to view one student's work: Can You Grant Me a Divorce?